50 Pumpkin Carving Ideas: Easy, Cute, Scary and Beginner-Friendly
Beginners can start with a classic face, drilled dots or a large moon-and-stars pattern. Children can draw, scoop with supervision or choose one of the five no-carve projects; an adult should handle every cut.
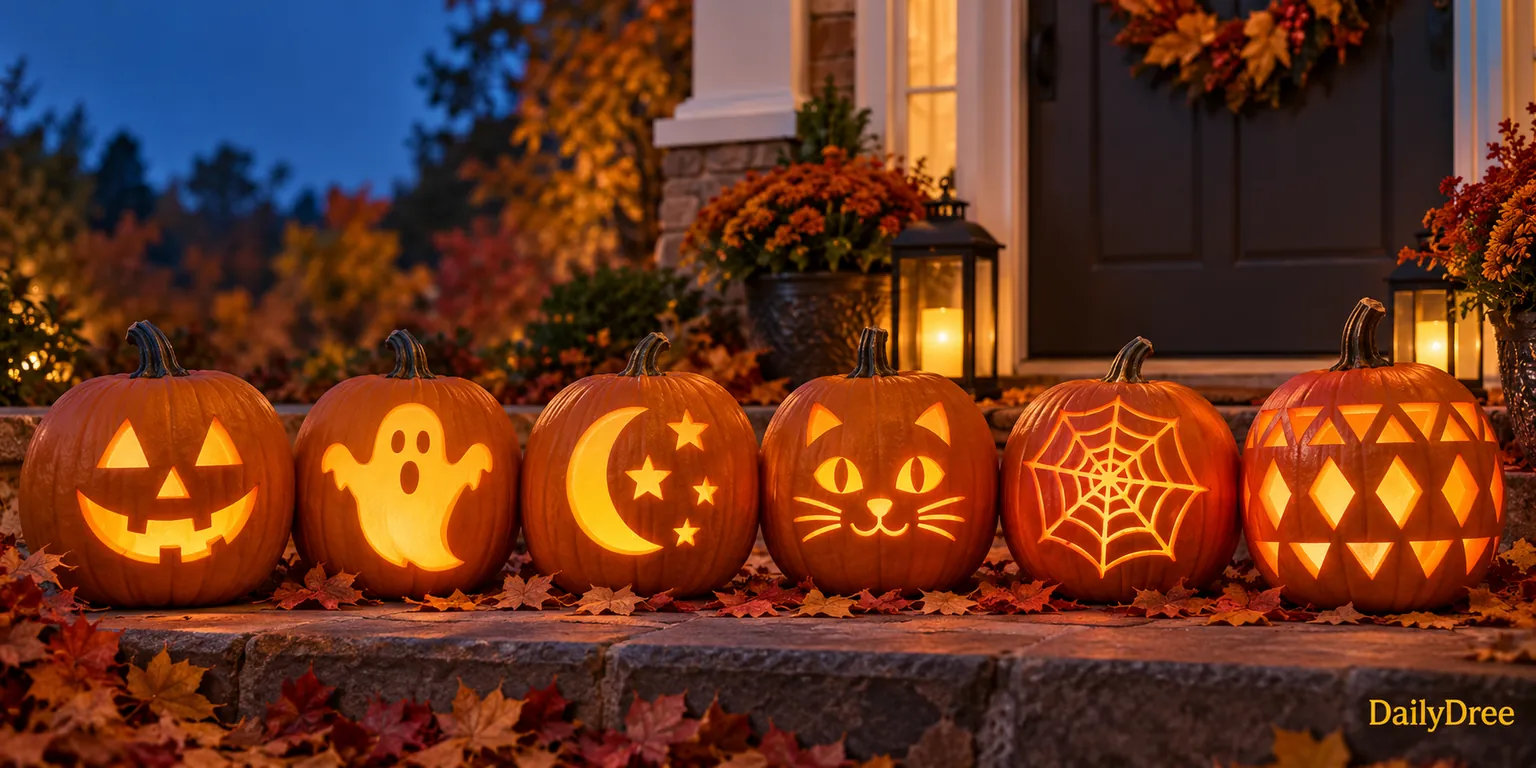
The best pumpkin carving idea is not necessarily the most complicated one. It is the design that fits your pumpkin, your available time and the person doing the carving. This guide offers 50 original ideas arranged by style, with a realistic difficulty level, active-time estimate and practical tip for each.
The images on this page are newly created DailyDree concept images, not photographs of tested step-by-step builds. Your result will vary with the pumpkin’s shape, wall thickness, tools and experience.
Choose a Pumpkin Idea in 30 Seconds
If you are short on time, use this quick selector before exploring the full list. Active times are estimates and do not include paint or glue drying time.
| If you want… | Start with | Difficulty | Active time |
|---|---|---|---|
| The easiest carved face | Classic triangle face | Easy | 20–30 min |
| The fastest glowing design | Drilled dot constellation | Easy | 15–25 min |
| A bright porch centerpiece | Friendly ghost | Easy | 25–35 min |
| A child-friendly project | Pressed-leaf collage | No-carve | 20–30 min |
| An impressive beginner design | Moon and stars | Easy–medium | 35–50 min |
| A clean scary design | Staring eyes | Easy | 20–30 min |
Tools and a Safer Setup
Use a firm pumpkin with an intact stem and no soft spots. Set it on a dry, stable surface with good light. A large spoon or pumpkin scoop, washable marker, paper, tape, a pushpin and a purpose-made small serrated pumpkin saw cover most designs. Keep a bowl nearby for seeds and pulp.
The U.S. Consumer Product Safety Commission advises leaving pumpkin cutting to adults; children can draw the pattern and help remove pulp. Cut slowly, keep hands dry, work away from your body and do not force a stuck blade. Use a battery-powered light instead of an open flame. These precautions matter more than finishing quickly.
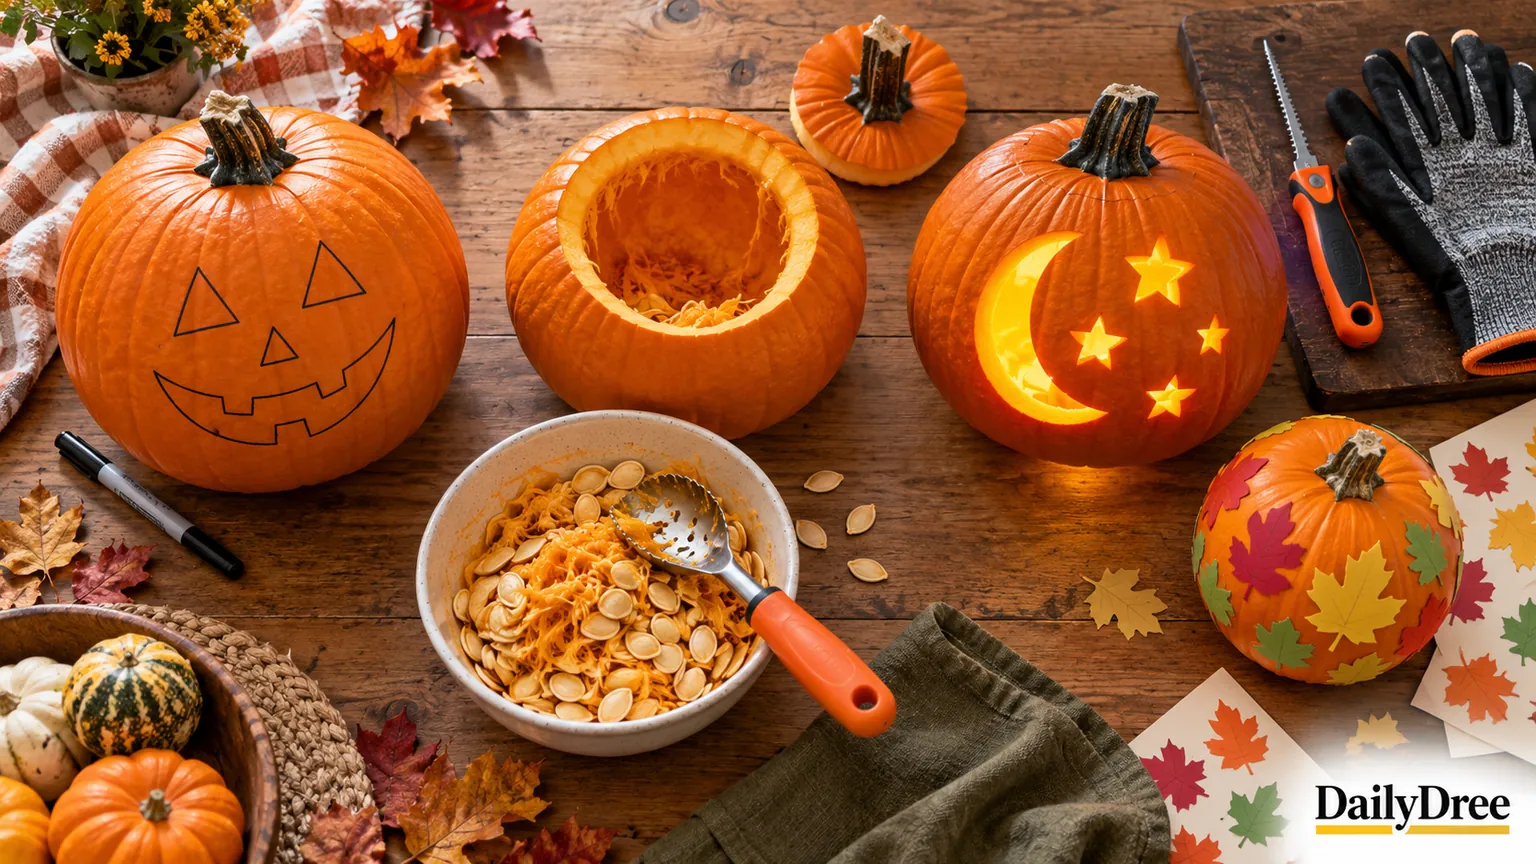
12 Easy Pumpkin Carving Ideas for Beginners
Large openings, simple shapes and thick rind bridges make these designs more forgiving for first-time carvers.
- Classic triangle face — Easy, 20–30 minutes, best on a round and smooth pumpkin. Draw two large triangles and a wide mouth with thick teeth. Round the internal corners slightly because sharp corners are more likely to tear.
- Round surprised face — Easy, 20–25 minutes, best on a tall or oval pumpkin. Trace two round eyes and one large oval mouth around bottle caps, then begin each opening with a small pilot hole.
- Friendly ghost — Easy, 25–35 minutes, best on a wide front surface. Draw one bold ghost with a wavy base and oval eyes. Keep the body as one broad opening instead of adding thin, fragile arms.
- Moon and stars — Easy–medium, 35–50 minutes, best on a smooth pumpkin. Place a large crescent off-center, surround it with four simple stars and turn the smallest stars into drilled dots.
- Drilled dot constellation — Easy, 15–25 minutes, suitable for most medium pumpkins. An adult can make different-sized holes with a hand drill or pumpkin-safe punch, leaving generous space between them.
- Sleepy face — Easy, 20–30 minutes, best on a short, wide pumpkin. Use two downward-curving eyelids and a tiny round mouth. Widen the eye cuts enough for the expression to glow at night.
- Gap-tooth grin — Easy, 25–35 minutes, best on a broad front. Sketch one wide mouth and leave two thick rind bridges as teeth, making each tooth wider at the base than at the tip.
- Bold bat silhouette — Easy–medium, 30–40 minutes, best on a flat-fronted pumpkin. Choose one large bat and simplify each wing into three broad points instead of carving many tiny bats.
- Autumn leaf window — Easy–medium, 30–45 minutes, best on a pale or deep orange pumpkin. Trace one maple or oak leaf but ignore tiny serrations that weaken the design.
- Little haunted house — Medium, 45–60 minutes, best on a tall pumpkin. Create a chunky house with two windows and a crooked door, leaving thick rind between openings and around the roof.
- Simple starburst — Easy, 20–30 minutes, best on a round pumpkin. Cut one central circle and arrange short triangular rays around it, with a finger-width of rind between the center and every ray.
- Smiling jack-o’-lantern — Easy, 25–35 minutes, best on a symmetrical pumpkin. Use half-moon eyes, a triangle nose and an upturned mouth with three or four broad teeth.
10 Cute Pumpkin Carving Ideas
These designs use friendly expressions and mixed carving, paint or removable paper details to keep delicate shapes manageable.
- Curious cat face — Easy–medium, 35–45 minutes, best on a round pumpkin. Carve almond eyes, a triangle nose and short whisker slots; add removable paper ears instead of cutting the top edge.
- Wide-eyed owl — Medium, 45–60 minutes, best on a short pumpkin. Build the face around two oversized circular eyes, add a triangle beak and draw feather marks rather than making many small holes.
- Friendly one-eyed monster — Easy, 25–35 minutes, ideal for a lopsided pumpkin. Give it one enormous eye and an uneven smile with one or two chunky teeth.
- Little fox — Medium, 40–55 minutes, best on an oval pumpkin. Use angled eyes and a rounded nose, then paint white cheek patches so the face needs fewer fragile cutouts.
- Happy cloud and raindrops — Easy–medium, 35–45 minutes, best on a wide pumpkin. Cut a cloud with broad rounded bumps and place three well-spaced teardrops below it.
- Sunflower face — Medium, 45–60 minutes, best on a round pumpkin with visible ribs. Let the ribs suggest petals, carve a smiling center and score or draw the petals without cutting a complete ring.
- Mushroom cottage — Medium, 50–70 minutes, best on a squat pumpkin. Carve a rounded door and two windows, then paint a mushroom-cap border above them.
- Puppy face — Easy–medium, 30–45 minutes, best on a round pumpkin. Make two large eyes, a broad nose and a smiling mouth, then add removable felt or paper ears.
- Heart-eyes pumpkin — Easy, 25–35 minutes, best on a smooth front. Trace two generous heart eyes and a crescent smile, rounding the deepest point of each heart slightly.
- Tiny pumpkin family — Easy, 40–60 minutes total, using three small pumpkins. Give each one a different simple expression and display them together rather than crowding one small surface.
8 Funny Pumpkin Carving Ideas
Natural bumps, tilts and uneven shapes can become the joke, so these ideas do not depend on perfect symmetry.
- Crooked grin — Easy, 20–30 minutes, best on a tilted pumpkin. Follow the lean with mismatched eyes and a grin that climbs one side, leaving two chunky teeth at different heights.
- Curly mustache face — Medium, 40–50 minutes, best on a wide pumpkin. Carve simple eyes and a small mouth, then paint a sweeping mustache; a carved mustache needs thick connected ends.
- Pumpkin with braces — Medium, 45–60 minutes, best on a broad front. Cut a rectangular grin with square teeth and paint the braces silver instead of adding sharp wire.
- Snack monster — Easy, 25–35 minutes, best on a large pumpkin. Carve one oversized mouth and place a separate mini pumpkin nearby as the pretend snack rather than wedging it into the opening.
- Peekaboo eyes — Easy, 20–30 minutes, best on a tall pumpkin. Place two eyes near one side as though the pumpkin is peeking around a corner and leave the rest intentionally empty.
- Stacked expressions — Medium, 50–70 minutes total, using two or three pumpkins. Give each pumpkin a different reaction, but arrange them securely rather than balancing an unstable stack near a walkway.
- Tongue-out face — Easy–medium, 30–40 minutes, best on a round pumpkin. Carve an open mouth while leaving a broad tongue connected at the bottom, then paint the tongue instead of thinning it.
- Big-nose character — Easy, 25–35 minutes, ideal for a pumpkin with a natural bump. Rotate the pumpkin until the bump becomes the nose, then cut only the eyes and mouth around it.
10 Scary Pumpkin Carving Ideas Without Graphic Gore
Bold shadows, narrow eyes and recognizable silhouettes can feel spooky without graphic details.
- Vampire fangs — Easy–medium, 30–45 minutes, best on a wide pumpkin. Cut narrow eyes and a broad mouth, leaving two thick downward fangs with wide bases.
- Haunted-house skyline — Medium, 55–75 minutes, best on a large flat front. Carve the windows, moon and negative space around a chunky roofline while leaving the house as dark rind.
- Spiderweb — Medium, 50–70 minutes, best on a smooth pumpkin. Use shallow scoring for most web lines and carve only a few intersections all the way through.
- Staring eyes — Easy, 20–30 minutes, suitable for any shape. Carve two long eye openings with heavy upper lids and skip the mouth for a more unsettling result.
- Skull outline — Medium, 45–60 minutes, striking on a pale pumpkin. Use two eye sockets, a small upside-down-heart nose and four mouth slots while drawing the jaw instead of cutting it out.
- Graveyard silhouette — Medium, 50–70 minutes, best on a wide pumpkin. Cut a glowing sky around broad rounded headstones and a simple moon, avoiding thin crosses or fence spikes.
- Twisted tree — Medium–hard, 60–90 minutes, best on a large pumpkin. Draw a thick trunk with only three or four main branches and carve the negative space while keeping every branch connected.
- Cracked smile — Easy–medium, 30–45 minutes, best on an irregular pumpkin. Create a narrow zigzag mouth that widens at several points and end each side in a round hole to discourage further splitting.
- Witch-hat shadow — Easy–medium, 35–50 minutes, best on a tall pumpkin. Carve the space around one simple hat silhouette, leaving a broad dark brim and using drilled dots for stars.
- Ghost crowd — Medium, 50–70 minutes, best on a wide pumpkin. Arrange three broad ghost shapes at different heights, each with distinct eyes and plenty of rind between bodies.
5 Minimalist and Geometric Pumpkin Ideas
Repeating shapes create a modern lantern effect, but generous spacing is essential for strength.
- Repeating diamonds — Easy–medium, 30–45 minutes, best on a round pumpkin. Draw one even row around the center, cut every other diamond and leave the rest drawn or lightly scored.
- Vertical glow stripes — Easy, 25–40 minutes, best on a tall pumpkin. Follow four or five natural ribs with long openings that stop well before the top and bottom.
- Crescent cutouts — Easy–medium, 35–45 minutes, best on a smooth pumpkin. Repeat three crescents from large to small, changing their direction and rounding sharp tips.
- One-line expression — Easy, 20–30 minutes, best on a smooth pale pumpkin. Use two short eye slits and one continuous curved mouth with no extra decoration.
- Leaf lattice — Medium–hard, 60–90 minutes, best on a large pumpkin. Arrange six broad leaves in a loose ring, leave a finger-width between them and score rather than cut the veins.
5 No-Carve Pumpkin Ideas for Children and Families
These projects avoid cutting, but adults should still supervise small decorations and adhesives. Use washable, water-based materials when practical and remove every attachment before composting.
- Painted silhouette pumpkin — Easy, 20–30 minutes plus drying, best on a pale pumpkin. Tape down one large paper bat, cat or leaf, paint around it and lift the template away.
- Sticker mosaic — Very easy, 15–25 minutes, best on a small smooth pumpkin. Use removable paper dots or leaf stickers to make stripes, a face or a color gradient.
- Yarn-wrapped pumpkin — Easy, 25–40 minutes, best on a small pumpkin with a sturdy stem. Wrap thick yarn along the grooves, tie it securely and avoid loose loops around children or pets.
- Paper-mask pumpkin — Easy, 20–30 minutes, best on a round pumpkin. Decorate a simple card mask on the table, then tie it around the pumpkin with ribbon.
- Pressed-leaf collage — Easy, 20–30 minutes, suitable for any firm pumpkin. Arrange dry leaves into a face, crown or radiating pattern and attach them with a child-safe craft adhesive used according to its label.
How to Transfer a Pumpkin Carving Template
Letters such as A, B, O, P and R contain enclosed centers. A stencil needs small uncut bridges to hold those centers in place. Make the bridges thicker than you think you need; they become less noticeable when the pumpkin glows.
- Resize the pattern so it fits the smoothest front section without wrapping sharply around the sides.
- Cut small relief slits around the paper edge so a flat template can curve over the pumpkin.
- Tape the pattern at several points so it cannot shift.
- Have an adult use a pushpin to mark closely spaced dots along the lines.
- Shade every section that will be removed so you do not accidentally cut a necessary bridge.
- Remove the paper, connect the dots with washable marker and check that every floating detail connects to solid rind.
A Safer Step-by-Step Carving Method
Slow, controlled cuts protect both the carver and the design. If a tool sticks, stop and reposition it rather than pushing harder.
- Wash and dry the pumpkin, your hands and the workspace.
- An adult cuts an access lid or rear opening with a purpose-made carving tool. Angle a top-lid cut inward so it has a ledge.
- Scoop out seeds and pulp. Scrape the wall behind the design until it is easier to cut, but do not make it paper-thin.
- Transfer and inspect the whole pattern before making any cut.
- Cut the smallest interior openings first, then larger areas. Saw gently instead of pushing hard.
- Remove pieces from the inside when possible and never pry against a narrow rind bridge.
- Clear loose scraps and test the design with a battery light in a dim room.
- Display the pumpkin on a level surface away from exits, curtains, heat sources, dry decorations and foot traffic.
How to Light and Display Your Pumpkin
Use a battery-powered LED light or glow stick. It creates a clear glow without an open flame. The National Fire Protection Association recommends battery-operated candles or glow sticks in jack-o’-lanterns and keeping decorations away from heat sources and exits.
Choose a level display spot where the pumpkin cannot roll. Place the light so its switch remains accessible, follow the manufacturer’s instructions and turn it off when the display is unattended.
How Long Will a Carved Pumpkin Last?
There is no reliable trick that guarantees a fixed lifespan. Temperature, humidity, rain, insects and the pumpkin’s starting condition all matter. University of Minnesota Extension notes that carved pumpkins can mold and collapse in warm weather, so carve closer to Halloween when conditions are warm.
Start with an undamaged pumpkin, use clean tools, keep it cool and dry, and bring it in from heavy rain or strong daytime heat when practical. Discard it when it becomes soft, moldy, leaking or unstable. Do not rely on a pumpkin that has been carved and displayed as food.
Cleanup, Disposal and a Better Carving Night
Collect tools immediately and wash them according to the manufacturer’s instructions. Sweep up rind pieces so they do not become a slipping or pet hazard. Compost the pumpkin only if your local program accepts it and it is free of paint, glitter, wax, wire, batteries and other decorations.
Keep the table lively with a few low-pressure questions while an adult works on the cutting. A shared activity is more enjoyable when nobody has to rush the design.
Frequently Asked Questions
What Is the Easiest Pumpkin Carving Idea?
A classic triangle face is the easiest all-round choice because it uses large, straight-edged openings. A round surprised face or drilled-dot pattern is also beginner-friendly. Keep details large and leave thick rind between openings.
How Early Should I Carve a Pumpkin Before Halloween?
Carve as close to the event as your schedule allows, especially in warm or humid weather. There is no universal number of days because conditions vary. Store the pumpkin cool and dry, and replace it if it becomes soft, moldy or unstable.
Can Children Carve Pumpkins?
Children can choose a design, draw on the pumpkin and help scoop pulp with close adult supervision. The CPSC advises leaving cutting to adults. For a tool-free activity, use paint, paper stickers, yarn or a removable mask.
What Tool Is Best for Carving a Pumpkin?
A small purpose-made serrated pumpkin saw gives an adult more control than forcing a large kitchen knife through the rind. A scoop, washable marker, paper template, tape and pushpin handle the remaining steps. Follow the tool manufacturer’s directions.
How Do I Stop a Detailed Design From Breaking?
Begin with the smallest holes, use gentle sawing motions and keep all rind bridges broad. Simplify narrow points and use surface scoring or paint for delicate details. Never pry a cut piece against a thin bridge.
What Can I Use Instead of a Candle?
Use a battery-powered LED light or glow stick. Keep the display dry, follow the light manufacturer’s instructions and switch it off when unattended.
Can I Use a Printed Pumpkin Carving Template?
Yes. Resize it to the pumpkin, tape it securely, transfer the outline with pinholes and mark the waste sections before cutting. Ensure enclosed letters and shapes have uncut bridges connecting them to the surrounding rind.
Can a Painted Pumpkin Be Composted?
It depends on the paint, decorations and local composting rules. Remove all nonorganic materials first. If the pumpkin contains paint, glitter, glue, wire or plastic, check your local program rather than assuming it is accepted.
Sources
◆